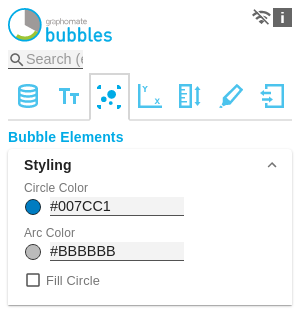
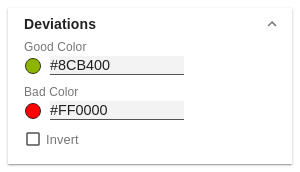
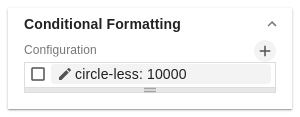
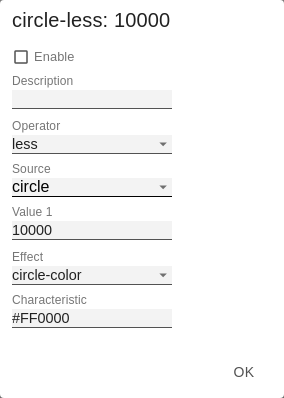
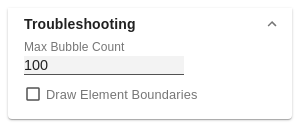
Here you can set the color of the circle area line by clicking on the corresponding color field or by entering a HEX code. Here you can set the color of the arc by clicking on the corresponding color field or by entering a HEX code. If Fill Circle is activated, the area of the circle is filled with the Circle Color. Here you can set the colors for positive (Good Color) connoted deviations by clicking on the corresponding color field. Here you can set the colors for negative (Bad Color) connoted deviations by clicking on the corresponding color field. If the checkbox Invert is activated, positive deviations are evaluated as negative and thus get the color for negative deviations (and vice versa). This configuration allows the appearance of the bubbles to be adjusted based on conditions. With a click on the +- symbol a dialog opens in which the conditions is defined, For each bubble, the value from the selected series (Source) is compared with the operand(s) (Operator). If the condition applies, the selected (optical) Effect is applied. Depending on the selected Operator, between none and 2 operands must be selected. Sets the limit for the maximum number of bubbles up to which no performance problems occur. Using values greater than 100 is not recommended. If the limit is reached, a performance-optimized display is used for the bubbles. Only the X and Y dimensions are used here. The individual data points are displayed transparently, so that accumulations of data points appear darker and therefore focal points can be recognized. To identify outliers, a tooltip is displayed when moving the mouse over a bubble. This option is intended for test purposes. If it is activated, its limits are drawn for each element. These boundaries are used by the collision logic to hide overlapping labels. Styling
Circle Color
Arc Color
Fill Circle
Deviations
Good Color
Bad Color
Invert
Conditional Formatting
Configuration
Configuration Pop-Up
Troubleshooting
Perfomance Limit
Draw Boundaries
General
Content
Integrations
